mirror of
https://github.com/eliboa/TegraRcmGUI.git
synced 2024-11-28 05:02:06 +00:00
C++ GUI for TegraRcmSmash (Fusée Gelée exploit for Nintendo Switch)
|
|
||
|---|---|---|
| .github | ||
| TegraRcmGUI | ||
| .gitignore | ||
| .gitmodules | ||
| LICENSE | ||
| README.md | ||
| TegraRcmGUI.sln | ||
TegraRcmGUI
C++ GUI for TegraRcmSmash by rajkosto (Fusée Gelée exploit for Nintendo Switch)
The RCM exploit only works on "unpatched" units, i.e manufactured before July 2018. To check if your Switch is patched, use https://ismyswitchpatched.com/
Features
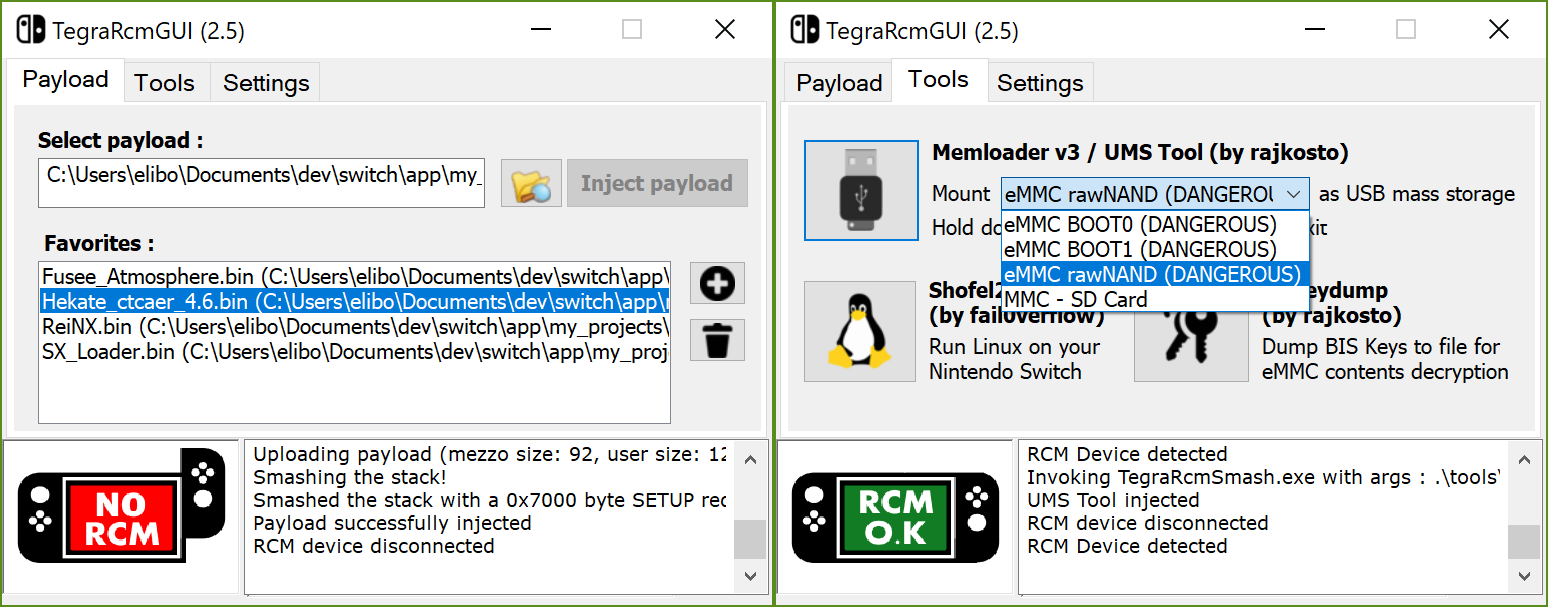
- Inject payloads
- Manage favorites
- Run Linux on your switch (ShofEL2)
- Mount device as USB mass storage (read/write from/to SD card & NAND partitions, hold power button down for 5sec to exit)
- Dump BIS keys for eMMC content decryption (biskeydump by rajkosto)
- Option - "Auto inject" : automatically inject payload after selection or/and when the Switch is plugged in RCM mode
- Option - Minimize app to tray & tray icon's context menu
- Option - Run app at Windows startup
- Install APX device driver (if needed)
Download
Latest release (Windows)
Important notice
This UI is Windows-only. For other platforms, you can use :
- Fusée Launcher (GNU/Linux)
- NXBoot (OS X, iOS)
- JTegraNX (Windows, OS X, GNU/Linux)
- NXLoader (Android)
- Web Fusée Launcher (Cross-platform, only works with Chrome)
Issue / Suggestion
Please open new issue to report a bug or submit a suggestion.
Development
Install the libusbk dev kit using the setup program, then create an environment variable LIBUSBK_DIR with the installation path as the value.
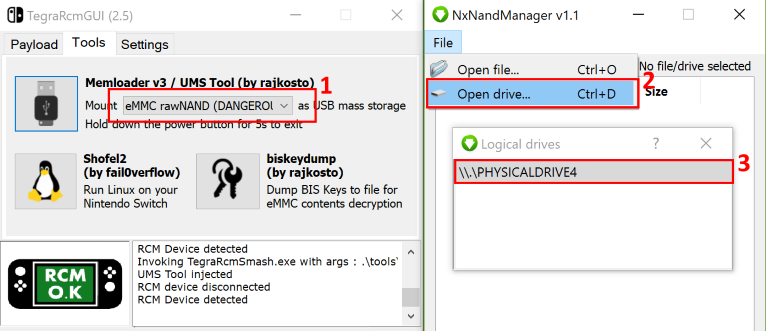
How to backup/restore your Nintendo Switch's NAND ?
- Use memloader v3 to mount eMMC on your computer
- Download and open NxNandManager. Select "File" then "Open drive".
- Select the mounted drive. You can now perform backup/restore operations.
Credits
- Rajkosto / TegraRcmSmash (Fusée Launcher reimplementation for Windows), memloader, SD tool, biskeydump
- Kate Temkin / Fusée Launcher
- fail0verflow / ShofEL2 (Boot stack for no-modification, universal code execution and Linux on the Nintendo Switch)
- SciresM / Atmosphere
- CTCaer / Hekate
- Reisyukaku / ReiNX


